
This collection of tips for tile installation will help you get the job done right the first time!
Collect the Necessary Tools and Materials

Here are several tools and materials you’ll want to have on hand for your next tile installation project:
- Tile
- Thin-set mortar/adhesive
- Grout
- Sealant (if needed for your tile type)
- Bucket(s)
- Rags
- Safety glasses
- Knee pads
- Grout float
- Sponge
- Level
- Notched trowel
- Margin trowel
- Tape measure
- Utility knife
- Sanding block
- Tile nippers
- Tile saw/tile cutter
- Abrasive pads
- Alignment clips
- Tile spacers
- Hammer
- Pencil
- Drill and paddle mixer

Invest in a Suction Cup Handle
Suction cup handles, like the one seen in the photo below, can be very handy, especially for beginners working with smooth-faced tile. You won’t find them in all hardware stores, but they’re easy to order online. A suction cup handle enables you to adjust crooked tiles and lift sunken ones to ensure the tiles are laid precisely and evenly.

Buy 10% More Tile Than You Need
If you’ve read any of our other blog posts about tile installation, then you’re likely familiar with this tip! We always recommend buying 10% more tile than you need to cover the area where you’re installing it.
In the case that any tiles crack during transportation, you’ll be covered. If you accidentally break any tiles during installation, you’ll have extras available. The same goes for future repairs and potential issues with differing dye lots.
You can calculate the amount of tile you need using a tile calculator like this one, but we recommend using the calculator built into each of our product pages.
As you can see in the graphic below, you can simply enter the number of square feet that you need to cover, and the calculator will tell you how many boxes you need to purchase. The pricing for that number of boxes will update automatically.

Here, we entered 200 square feet, and the quantity of boxes needed autofilled to eight. The price automatically updated to reflect the cost of eight boxes at $1251.04.

We also have a more detailed calculator for you to use (pictured below) if you’d like to enter the length and width of the area. This calculator will also make a recommendation for the number of boxes to buy with an additional 10% of tile included. It’s a simple and easy way to determine how much tile to purchase!

Always Do A Practice Layout First
Laying out your tile to see exactly how it fits together before installing it is crucial. Be sure to leave room for grout and plan out any cuts you’ll have to make. We recommend creating a visual reference to look back on as you install the tile. You can draw a scale drawing of the space or use online tools like this one to easily create a layout reference.

Avoid Cutting Tiles Smaller Than Half-Size
Ideally, all of your tiles should be the same size, but we know that’s rarely possible. To achieve the best symmetry, try to avoid cutting tiles any smaller than half-size, as very small tiles will draw the eye and look out of place next to full-size tiles. If you can, try to tuck away smaller pieces of tile so the flooring or wall covering looks more uniform. And remember this age-old piece of advice: “Measure twice, cut once!”
Make Sure Your Floor Is Level
Installation is bound to go awry if your floor isn’t level. Make sure your subfloor is strong, rigid, and even before you install tile. For wall tile, ensure the walls are plumb before installation.

Remove the Baseboards
We recommend removing all baseboards before laying floor tile. This gives you more wiggle room and allows you to be a little less precise. Once the baseboards are back in place, they’ll hide any small imperfections around the edges of the room.
Trim the Door Casings
It’s difficult to cut tile precisely to fit around door casings. Doing so also means the door casing will be locked in place by the tile and thus will be hard to remove. Instead, trim your door casings so that tile can slide underneath for a cleaner look and easier accessibility.
Start in the Middle
To keep your tile installation symmetrical, it’s best to start by laying the tile in the middle of the room and then working your way out. If you’re working with diamond-shaped tiles or are laying square tiles diagonally, install them in a pyramid formation for clean lines.
Follow These Adhesive and Grout Best Practices
- Choose the right adhesive and grout for your tile type.
- Select grout that will enhance the look of your tile. (Check out this article for more information.)

- Carefully read and follow the directions given by the adhesive and grout manufacturers.
- Use the right trowel size for your adhesive.
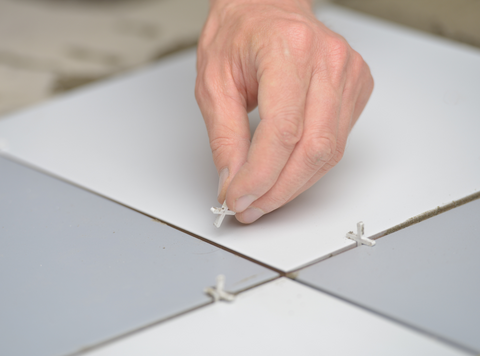
- Create even gaps for grout in between tiles with tile spacers.
- Slake your adhesive and grout by waiting for 10 minutes after mixing to allow any dry chunks time to absorb water. This will give you a smoother consistency and make the materials easier to work with. After the adhesive or grout has had time to slake, mix it again and add more water if needed.

- When you’re cleaning extra grout off the surface of the tiles, be sure to switch out your water frequently to avoid spreading grout residue and dealing with additional grout haze.

When In Doubt, Watch Video Tutorials
If you ever reach a point in the installation process where you’re feeling uncertain or aren’t sure about what written directions are telling you, look for online video tutorials. There’s no shortage of helpful videos online from both professionals and DIYers.
Don’t Forget to Seal Your Tile
Depending on the type of tile you have, you may need to seal the flooring after installation. You can refer to the manufacturer’s guidance for this. While many of today’s porcelain and ceramic tiles are glazed and don’t require sealant, certain unglazed and natural stone tiles need sealant for protection and longevity. Plus, sealed tile is much easier to clean and maintain.
Check Out Our Other Installation Resources
The Tilezz.com blog has tons of additional resources for you to read and refer back to. Here are several of our favorites that are sure to prove helpful.
- 5 Common Tile Installation Mistakes (And How to Avoid Them)
- 10 Tips and Tricks for DIY Tile Installation
- DIY Kitchen Backsplash Installation
- Refresh Your Tile with New Grout (DIY Project)
- DIY Wall Tile Installation
- 10 Steps for DIY Shower Tile Installation
- How to Install Tile Outdoors Without Hiring a Pro
- Create Your Own Tile Layout (Here’s How)
- 8 Things to Know Before You Install Natural Stone Tile
- Waterproof Your Tile Floor (DIY Project)
- How to Install a Glass Tile Backsplash (DIY Project)
- How to Clean and Maintain Your Tile

Find the Perfect Tile for Your Next Project at Tilezz.com!
At Tilezz.com, we pride ourselves on having a diverse range of products to suit all interior design styles and preferences. Check out our selection here, or visit our blog for more inspiration. We provide fast delivery, insured shipments, and easy returns with every order!